How to Easily Make and Deploy a Product Landing Page with Email Signup for Free
-23 April 2021
Intro
Professional product landing pages with an email signup form are a great way to get people signed up early for your product before its release. They can also be used to sign people up to a weekly newsletter.
Once signed up, we can then use email marketing. For example, you could send out a weekly email with updates on product development, and some tips and valuable information.
You can build up some excitement for your product, get your potential users to like and trust you, and show them you’re an expert of your niche – making them more likely to become paying customers.
Just don’t overdo it on the selling – remember to provide plenty of value in each email!
If you’re reading this article, I’m guessing you’re likely more of a technician than a marketer. I myself am happier coding away than sending out marketing emails. But if you plan to release a product at some point, it’s crucial to not neglect marketing.
“50% rule: spend 50% of your time on product and 50% on traction.” -- Gabriel Weinberg (founder of DuckDuckGo & author of bestselling book Traction)
In this tutorial, I’m going to show you how to make an awesome looking product landing page with a MailChimp email signup form. This can then be deployed to Netlify. Here’s the landing page I made for my Atomic Meditation app.
And best of all: it’s all free!
Part 1 – Downloading a HTML5UP Template
HTML5UP is a website where you can download beautiful, modern HTML templates completely free.
At this point, some of you might be complaining “But I didn’t learn to code to download templates!”
That’s true, but in this tutorial, the advantage of knowing how to code is that you can download great templates like this and use your coding skills to open up the files and customise them to your heart's content. Coding isn’t always about making everything from scratch – take advantage of the great tools around you!
I downloaded the “fractal” template as it makes for a really nice landing page for a mobile app – perfect for me!
Part 2 – How to Edit HTML5UP Templates
Take some time to study the files that you’ve just downloaded. The file you will want to understand is the index.html file.
Once you have an idea of what’s going on, it’s time to delve in and start adding your own images and copy.
Remember to add one or two email signup forms to your page. At the moment, just worry about styling and positioning the signup forms on the page. We’ll make them functional in the next step.
Here’s some code you could use to save you time (aren’t I generous?):
<form action="" method="POST" class="email-signup-form"> <label for="email">Email:</label> <input type="email" name="email" id="email" class="email-input" placeholder="Your email..." required /> <input type="submit" class="email-submit-input" /></form>.email-signup-form { max-width: 500px; margin: 0 auto; font-family: sans-serif; display: flex; flex-direction: column;}.email-signup-form label { text-align: left; font-size: 20px;}.email-input { padding: 11px 8px 11px 8px; margin-top: 8px; border-radius: 5px; font-size: 18px;}.email-submit-input { background-color: #36cc56; color: white; margin-top: 16px; width: 100%; height: 50px; font-size: 18px; border-radius: 5px; border: 0; cursor: pointer;}.email-submit-input:hover { background-color: #51d26d;}To produce this:
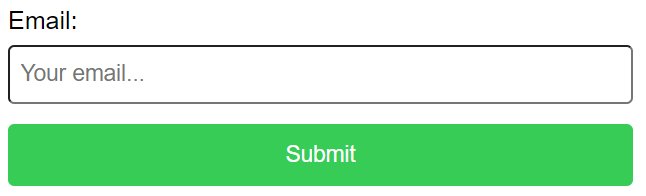
I turned this HTML5UP template into this Atomic Meditation landing page for my app. It only took me a few hours – not bad!
Part 3 – Integrating MailChimp
Mailchimp is a service where we can capture emails and then setup email marketing campaigns.
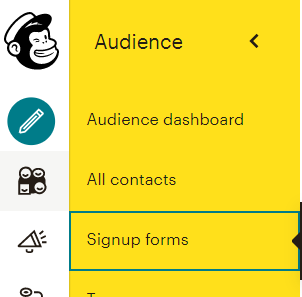
Once signed in, go into “Audience”, “Signup forms”.
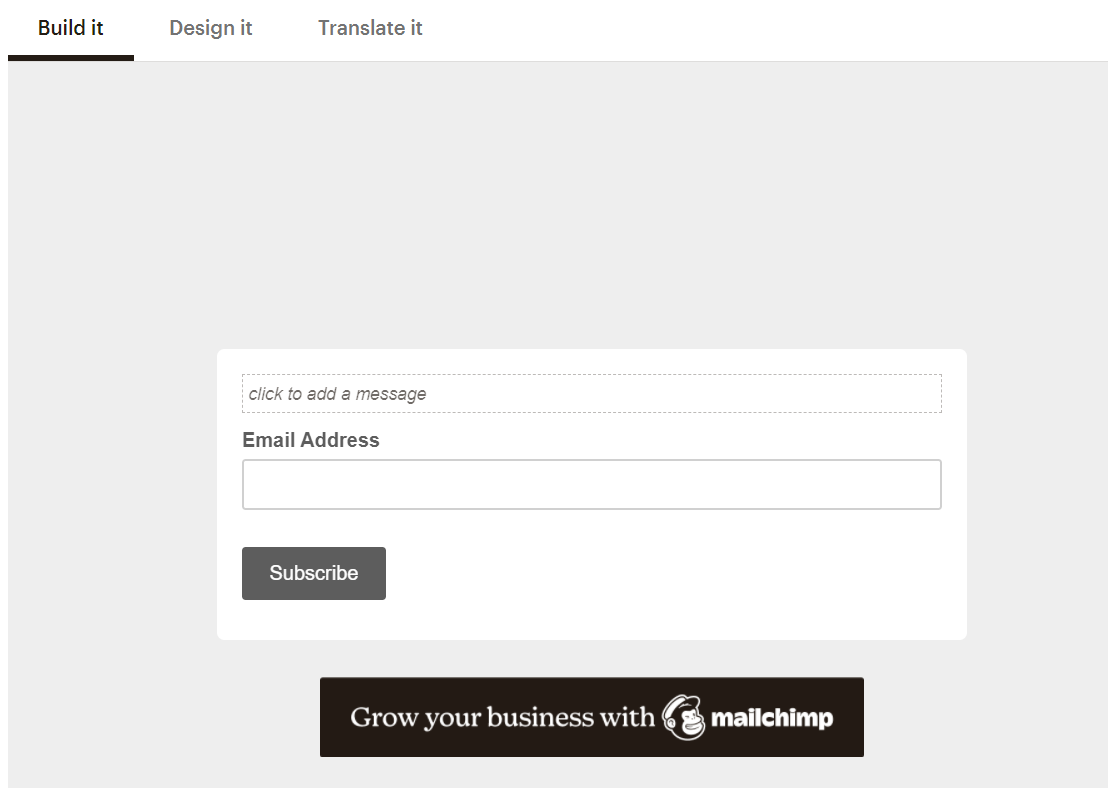
Select “Form builder”.

We can now build our form. In my case, I just wanted an email field and submit button, so I removed all the other fields to be left with the below:
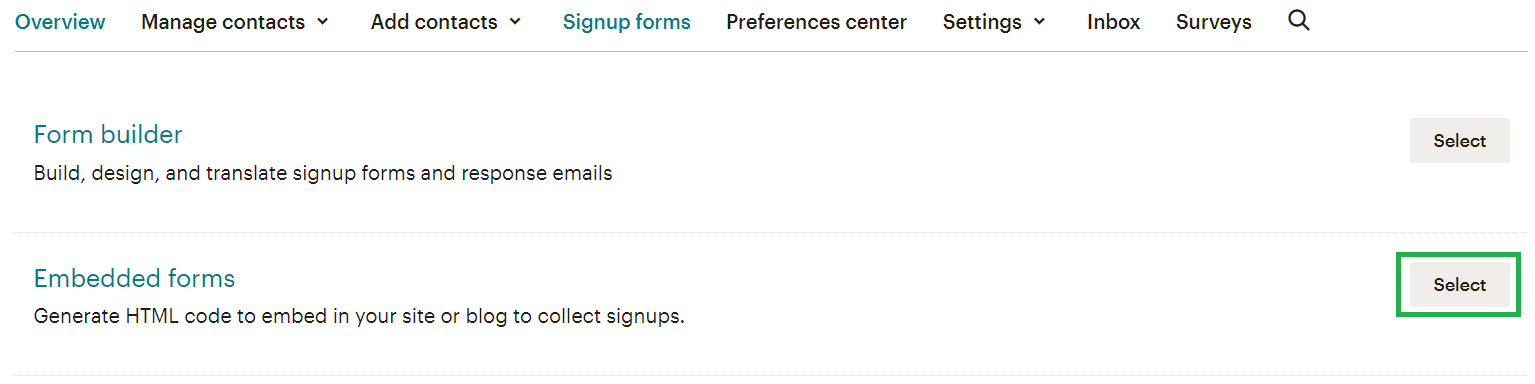
Go back into “Audience”, “Signup forms” and this time select “Embedded forms”.
MailChimp has made us some HTML that you can now copy into your landing page in place of the form we had before:
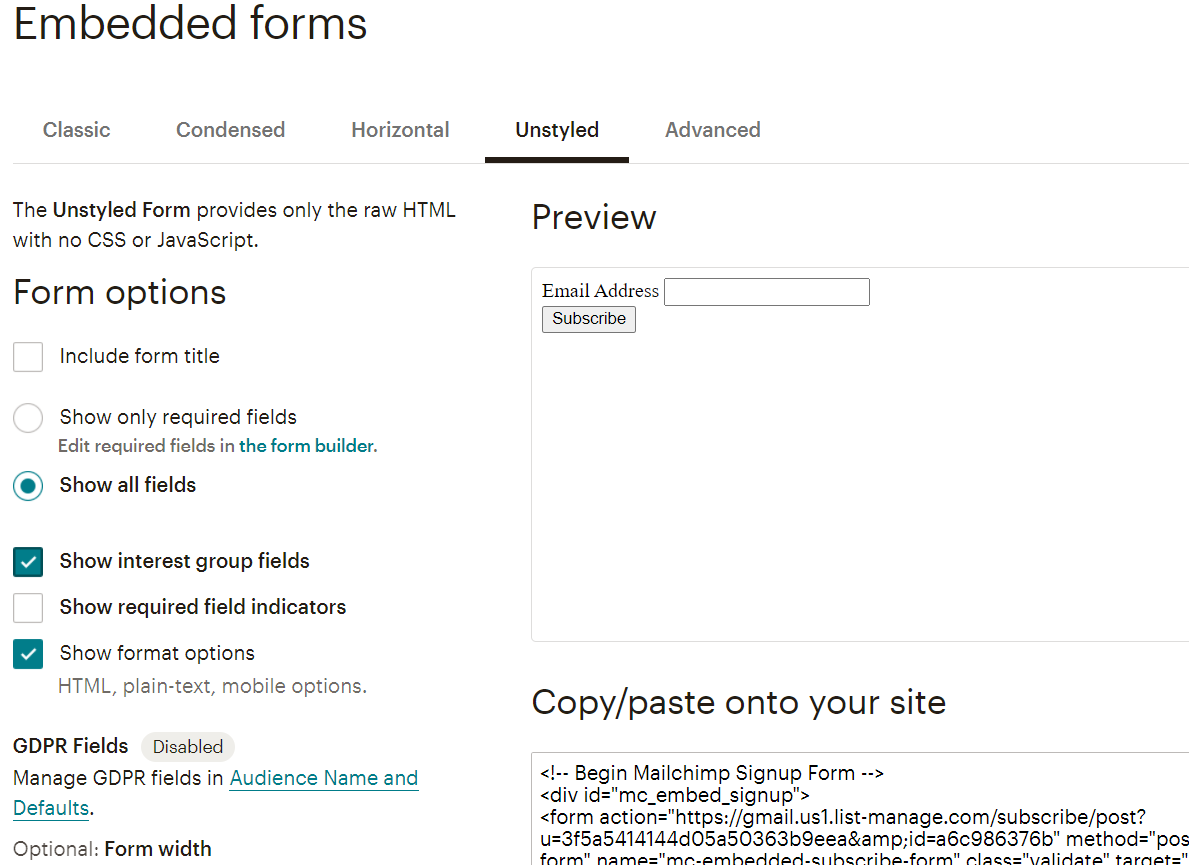
Style this form by adding in the CSS classes that we had before.
Now to try it… I enter an email and press submit… it works!!
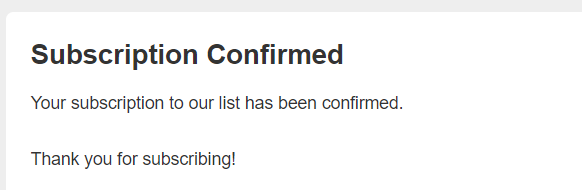
The email you entered will now be in your “Audience dashboard”.
Deploy the landing page
You can deploy static website for free with Netlify.
Not only is it free, it’s also super easy.
- Push your landing page to Github
- Login to Netlify and select “New site from Git”
- Link it to your Github repository. Now every time you update the landing page and push to Github, the site will automatically update!
Here is the Netlify URL to my site: atomicmeditation.netlify.app Note: I have setup a custom domain name so the page can be accessed via this URL: www.60daysofmeditation.com
If you’d like to setup a custom domain, check out my how to setup a custom domain article.
Conclusion
You now know how to make a landing page to promote your products! It’s all free and can be done in just a few hours of work.
If this was useful, you can say thanks by downloading my meditation app and leaving a review (hopefully positive!). It would be much appreciated! It’s a great app for developing a daily meditation habit and managing stress.
Have a great day :)


