How To Install and Setup React Native Track Player || Simple Project Example
-15 February 2021
Intro
In this tutorial I will show you how to install, setup and start using react native track player by building a super-simple react native track player example app.
I also made a video which you can follow to make your lives easier! You can show your support by subscribing to my channel! 🙏
1. Setting up our app
First, we need to initialise our react native project, install the track player package, and then run the project on an android or ios emulator.
Intall the react native starter files
npx react-native init yourProjectNameHere
Install react native track player
npm install react-native-background-timer --save
Run the app on an emulator
npx react-native run-android
2. Setting up react-native-track-player
Create a file called service.js in the root of your project. This file is necessary for the module to work.
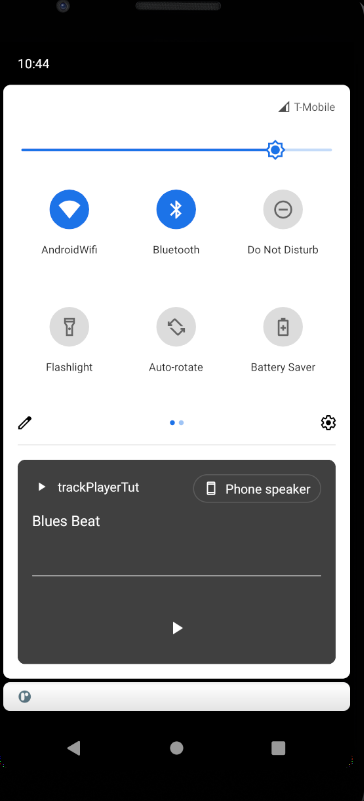
Next add the following code to service.js. This will alow you to play and pause tracks from outside the app.
import TrackPlayer from "react-native-track-player"module.exports = async function () { TrackPlayer.addEventListener("remote-play", () => TrackPlayer.play()) TrackPlayer.addEventListener("remote-pause", () => TrackPlayer.pause())}For example, tracks can be played and paused from the notification screen:
We then need to register the playback service as soon as the app is mounted. This is done in index.js.
import { AppRegistry } from "react-native"import App from "./App"import { name as appName } from "./app.json"import TrackPlayer from "react-native-track-player"AppRegistry.registerComponent(appName, () => App)TrackPlayer.registerPlaybackService(() => require("./service.js"))3. Add your tracks
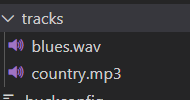
Create a tracks folder (you can call it whatever you want) in the project root and add your tracks. I have a wav and an mp3 audio file.
Next, go to App.js and delete everything in it, we will start afresh!
We will add all of the imports we need for this simple app at the top. Then define your tracks as below.
import React, { useEffect } from "react"import TrackPlayer from "react-native-track-player"import { StyleSheet, View, TouchableOpacity, Text } from "react-native"const tracks = [ { id: 1, url: require("./tracks/blues.wav"), title: "Blues Beat", }, { id: 2, url: require("./tracks/country.mp3"), title: "Blues Beat", },]4. Setup the track player on component mount
Below the tracks array, create the main App functional component. Don’t forget to add export default App; to the bottom of the file.
First add a useEffect hook and setup the trackplayer options. Make sure to add [] as a second argument to the useEffect so it only runs once, upon initial render.
In updateOptions, setting stopWithApp to false will keep the track playing in the background if your app is closed. For capabilities, in our simple app, we will only be playing and pausing tracks. Compact capabilities define what can be done in the compact notification, again we will only be playing and pausing.
Now we’ve defined the track players options, we call a setUpTrackPlayer function. This can be defined above the useEffect. This is an asynchronous function where we call the setUpPlayer method. We then add the tracks that we defined earlier. All going well, “Tracks added” will be logged to the terminal.
Finally, return a function that calls TrackPlayer.destory. This will clean up the trackplayer when the app is closed, ensuring tracks don’t unwantedly continue playing.
const App = () => { const setUpTrackPlayer = async () => { try { await TrackPlayer.setupPlayer(); await TrackPlayer.add(tracks); console.log('Tracks added'); } catch (e) { console.log(e); } }; useEffect(() => { TrackPlayer.updateOptions({ stopWithApp: false, capabilities: [TrackPlayer.CAPABILITY_PLAY, TrackPlayer.CAPABILITY_PAUSE], compactCapabilities: [ TrackPlayer.CAPABILITY_PLAY, TrackPlayer.CAPABILITY_PAUSE, ], }); setUpTrackPlayer(); return () => TrackPlayer.destroy(); }, []);5. Add the jsx
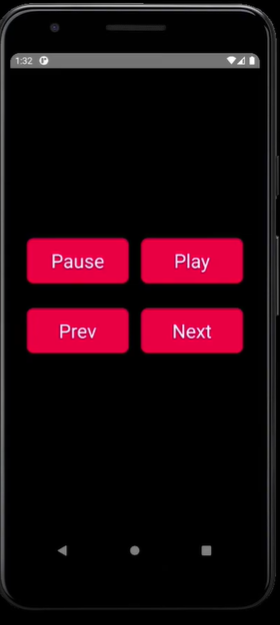
Everything will be wrapped in a View container to centre everything. We will then have two View rows, each containing two buttons. The first row contains pause and play. The second row contains prev and next to skip back and forth between tracks.
React Native Button components cannot be styled easily, so I made the buttons from a TouchableOpacity with a child Text component.
Each TouchableOpacity has an onPress event listener, with the necessary call-back functions.
return ( <View style={styles.container}> <View style={styles.row}> <TouchableOpacity style={styles.btn} onPress={() => TrackPlayer.pause()}> <Text style={styles.text}>Pause</Text> </TouchableOpacity> <TouchableOpacity style={styles.btn} onPress={() => TrackPlayer.play()}> <Text style={styles.text}>Play</Text> </TouchableOpacity> </View> <View style={styles.row}> <TouchableOpacity style={styles.btn} onPress={() => TrackPlayer.skipToPrevious()} > <Text style={styles.text}>Prev</Text> </TouchableOpacity> <TouchableOpacity style={styles.btn} onPress={() => TrackPlayer.skipToNext()} > <Text style={styles.text}>Next</Text> </TouchableOpacity> </View> </View>)6. CSS
And finally, some simple styling:
const styles = StyleSheet.create({ container: { flex: 1, justifyContent: "center", alignItems: "center", backgroundColor: "black", }, btn: { backgroundColor: "#ff0044", padding: 15, borderRadius: 5, margin: 10, width: 160, }, text: { fontSize: 30, color: "white", textAlign: "center", }, row: { flexDirection: "row", marginBottom: 20, },})And that’s it! Be sure to checkout the react-native-track-player docs for the full list of options and capabilities.
Now you’re setup, it should be pretty simple for you to add additional features and options!
If you found this post helpful, you can say thanks by subscribing to my YouTube channel!
Have a great day :)


