How to Add In-App Purchases to a React Native Android App for Google Play Store
-25 April 2021
Intro
Adding in-app purchases to a React Native project can be a time consuming and confusing task. So, in this tutorial I’ve made a very simple react native IAP example app to get you set up with a Google Play Store in-app purchase for Android, and more familiar with the IAP package.
I recently created a meditation app called Atomic Meditation implementing everything in this blog post. If you’d like to see how the in-app purchase will work first-hand, you can download the app, go into settings and press “purchase app”. The product will then be fetched from Google and shown to you. You then have the option of purchasing. If this blog post helps you, please consider giving the app a good review!
And if you prefer video, I posted this to YouTube: React Native In-app Purchases for Android | Example App. Consider subscribing if it helps!
I’ve decided to cover every single step in detail. Here are the steps:
- Making a simple app
- How to set up the Google Play console
- How to generate a release apk in react native
- How to add Google Play in-app products and test in-app purchases with licensed testers
- How to add an in-app purchase to our Android app
I’ve tried to leave nothing to guess work to make your lives easier (developing an app is hard enough).
I’m also taking advantage of the new useIAP hook which makes life much easier than before.
Here's the source code for this project.
Part 1 – Creating a simple app to upload to the play store
1. Setting up the React Native Project and Installing IAP Package
npx react-native init atomicMeditation
Doobolab (React Native IAP creator) recently added an IAP hook to the package, making it easier and quicker to setup up the package and get going. To use the IAP hook, we’ll need to install the latest package version by adding @next:
yarn add react-native-iap@next
Run the app on an emulator or real device using:
npx react-native run-android
Note: the app must be running on a real device for in-app purchases to work. To do this, you need to enable “USB debugging mode” on your android device. I followed this article for my Honor 9 lite.
In this example app, I’ll be storing a Boolean value called “isFullAppPurchased” in the user’s permanent memory so the app will always know if the user purchased full app access in the app. For this we’ll need the following package:
yarn add @react-native-async-storage/async-storage
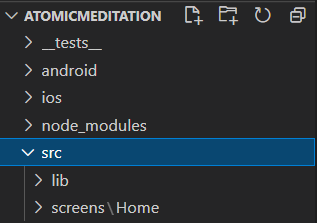
2. Setting up the file structure
Even though this example project is very simple, I’d still like to create a scalable file structure to help to show you how I’d go about organising a full app.
In the root directory, create a folder called src (source).
In src, create two more folders: lib (library) and screens.
In the screens folder, create a folder called Home.
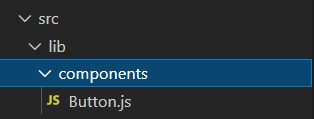
3. Creating a simple button
First let’s make a simple button that the user can press to make the in-app purchase.
Create the file src/lib/components/Button.js
Then copy the following code:
import React from "react"import { TouchableOpacity, Text, StyleSheet } from "react-native"const Button = ({ title, handlePress }) => { return ( <TouchableOpacity style={styles.btn} onPress={handlePress}> <Text style={styles.text}>{title}</Text> </TouchableOpacity> )}const styles = StyleSheet.create({ btn: { borderRadius: 12, paddingVertical: 14, paddingHorizontal: 14, minWidth: 280, alignSelf: "stretch", backgroundColor: "blue", }, text: { fontSize: 20, textAlign: "center", color: "#fff", },})export default ButtonThe Button accepts a title and a callback function for when the user presses it.
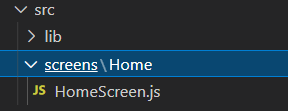
4. Creating a screen where the user can make in-app purchases
Create the file: src/screens/Home/HomeScreen.js
Copy in the code below:
import React from "react"import { View, StyleSheet, Text } from "react-native"import Button from "../../lib/components/Button"const HomeScreen = () => { return ( <View style={styles.container}> <Text style={{ ...styles.msg, color: "green" }}> This message will show when app has been purchased successfully </Text> <Button title="Purchase" /> <Text style={{ ...styles.msg, color: "red" }}> Error message will go here </Text> </View> )}const styles = StyleSheet.create({ container: { justifyContent: "center", flex: 1, backgroundColor: "lightblue", padding: 16, }, msg: { fontSize: 20, textAlign: "center", marginVertical: 16, },})export default HomeScreenExamples of how this will work (once we’ve implemented our inAppPurchase hook – part 5):
- If user presses purchase button with no internet when open app, a red error message appears below.
- If user presses purchase button and purchases app successfully, isFullAppPurchased becomes true and some green text is conditionally rendered above. But in your app, for example, you might be awarding access to some feature e.g. some gold coins or an article.
Now let’s bring this HomeScreen component into our main App.js file as follows:
import React from "react"import HomeScreen from "./src/screens/Home/HomeScreen"const App = () => { return <HomeScreen />}export default AppThis is our app so far:

5. Creating async storage helper functions
We will use the async-storage package to permanently store and retrieve the isFullAppPurchased state variable in the user’s phone.
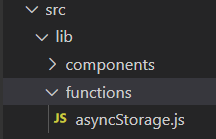
Create the file: src/lib/functions/asyncStorage.js:
Async-storage can only store string values but isFullAppPurchased is a Boolean value, so I’ve created a helper function called storeBooleanData that converts the value into a string before saving it.
I’ve also created a function – getBooleanData – that converts the string value from storage back into a Boolean before returning it.
I’m also keeping all the app’s storage keys at the top of this file so it’s easy to see what can be stored in memory from this one single place (good practice if the app gets larger).
import AsyncStorage from "@react-native-async-storage/async-storage"export const STORAGE_KEYS = { IS_FULL_APP_PURCHASED: "@is_full_app_purchased",}export const storeBooleanData = async (key, value) => { try { const stringValue = value.toString() await AsyncStorage.setItem(key, stringValue) } catch (e) { console.log(e) }}// getItem returns a promise that either resolves to stored value when data is found for given key, or returns null otherwise.export const getBooleanData = async key => { try { const value = await AsyncStorage.getItem(key) return value === "true" } catch (e) { console.log(e) }}6. Give billing permission
If an app includes in app purchases, you need to add the code below to android/app/src/main/AndroidManifest.xml:
<uses-permission android:name="com.android.vending.BILLING" />
So far, so good. Now we have a simple app, let’s set up our Google play console so we can upload the app. We’ll then be able to add in-app products.
Part 2 – How to set up the Google Play console
Sign up or sign into the Google play console.
Set up a merchants account (required if you want to make money from your app). It costs about 20 dollars and is a one-time purchase – you can make money from any number of apps. Follow this guide to set it up.
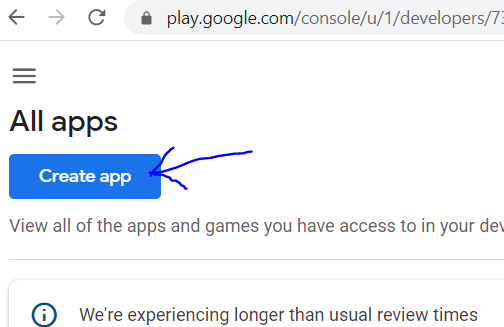
Go back to your Google play console and click “create app”:
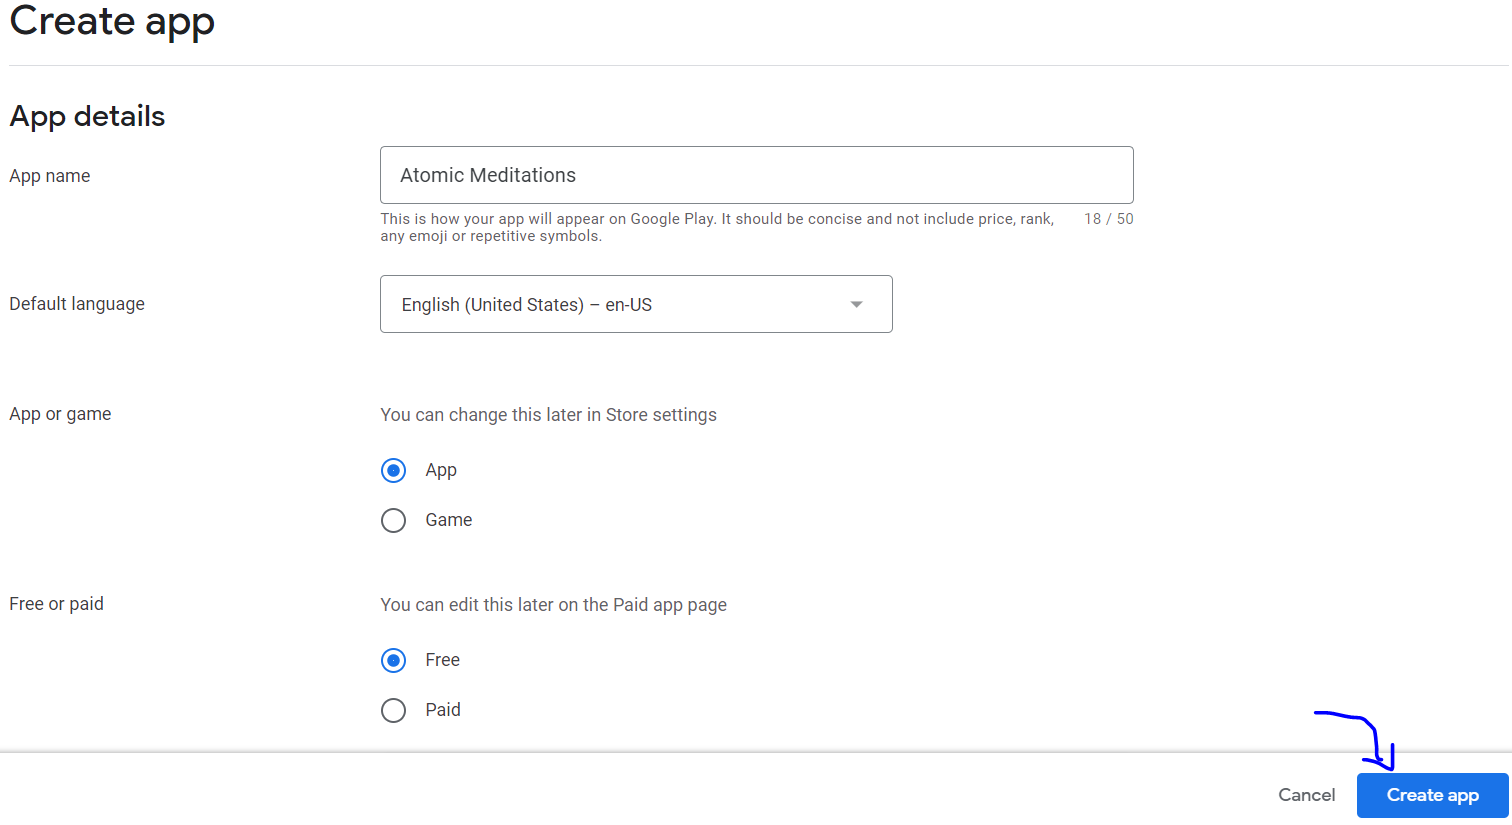
Fill out the form and click “create app”. I’m selecting “free” because I’m going to implement a freemium model (free download with in-app-purchases).
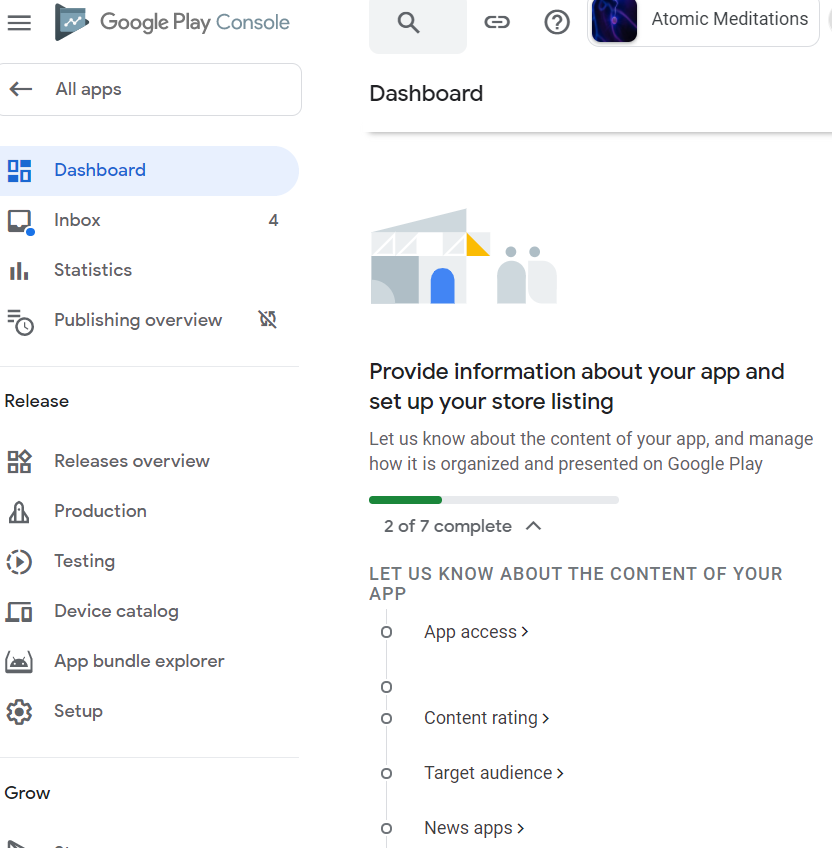
Google requires you to give them certain information before you can publish your app. You can see what needs to be done from your dashboard.
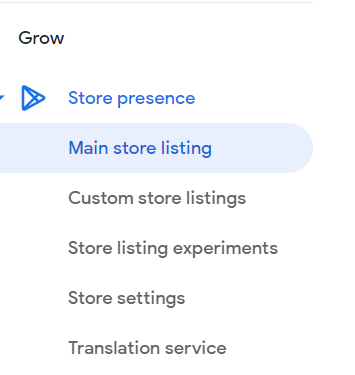
Adding main store listing info requires you to upload some images with specific sizes. I used this tool to resize images.
And this tool for device screenshots.
Next we need to generate a signed APK. We will then upload this APK to the Play store which will then allow us to add in-app products that can be fetched and purchased within our app.
Part 3 - How to generate a release apk in react native
I decided to write part 3 as a separate article - how to generate a release apk in react native - so it's of use to people not interested in implementing in-app purchases too.
Here I'll show you:
- how to generate a google play upload key
- how to store and load in your gradle variables securely so that you can safely push to Github without exposing them (something not covered in other posts)
- how to generate a signed release APK that can be uploaded to the Google Play Store.
Part 4 - How to add in app products and licensed testers
1. Upload the APK
Upload your signed APK for closed or open testing. Here I am doing an Alpha test (closed). Once uploaded, we will be able to add in app purchases.
Note: it may take a few days for Google to review your app for the first upload. Any uploads/updates after this usually only take minutes.
2. Add an in-app product(s)
To allow for in app purchases, we now need to create some in app products.
Add in your product details and price then click save/activate.
This product can now be accessed from our app!
3. Add licensed testers
This step will allow you and your testers to test in-app purchases without being charged.
- Click the “Google Play Console” logo at the top left to go to your “all apps” section.
- Scroll down the left menu and click “License Testing”.
- Add all of your testers emails and then select the license type. I usually select RESPOND_NORMALLY.
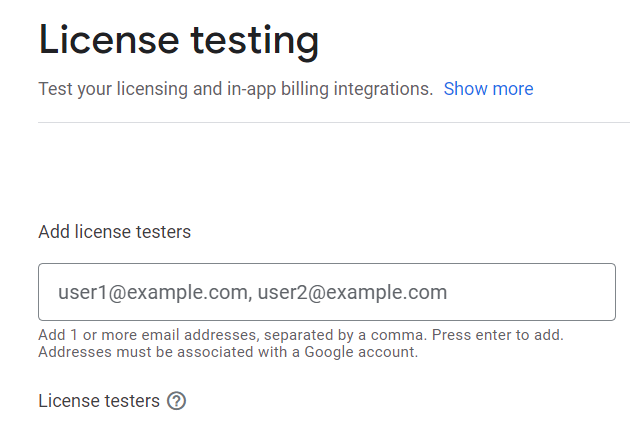
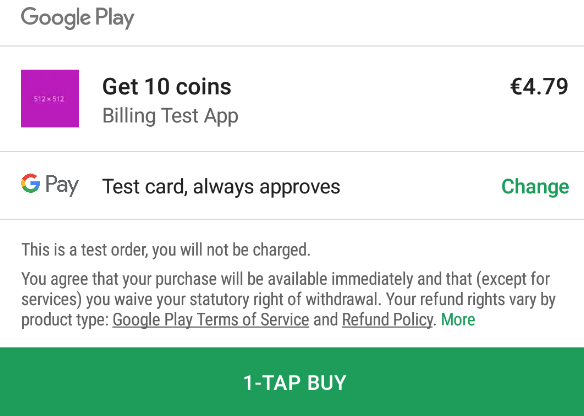
- Now when you release your app to Alpha or Beta release and add these testers, they will be able to purchase your app with a test card and be charged no money.
Now everything is set up, we will be able to fetch the products and test-purchase them from the app. So finally let’s implement an in-app purchase!
Part 5 – Implementing an in-app purchase with React Native IAP
1. Creating our useInAppPurchase custom hook
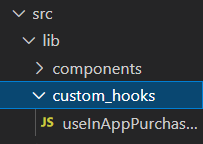
Create the file: src/lib/custom_Hooks/useInAppPurchase.js
First, we’ll set everything up by importing everything we’ll need, and creating and exporting the custom hook as default. I’ve also set up the state variables isFullAppPurchased and connectionErrorMsg.
The itemSKUs are from the in-app products that I set up earlier in the Google Play store (change these to what you put for your product ids). We will use these SKUs to fetch our products from the store soon.
import { useEffect, useState } from "react"import { Platform } from "react-native"import { requestPurchase, useIAP } from "react-native-iap"import { STORAGE_KEYS, storeBooleanData, getBooleanData,} from "../functions/asyncStorage"const { IS_FULL_APP_PURCHASED } = STORAGE_KEYS// Play store item Idsconst itemSKUs = Platform.select({ android: ["full_app", "test_4"],})const useInAppPurchase = () => { const [isFullAppPurchased, setIsFullAppPurchased] = useState(false) const [connectionErrorMsg, setConnectionErrorMsg] = useState("") return { isFullAppPurchased, connectionErrorMsg, }}export default useInAppPurchaseNext, we’ll add a useEffect to our custom hook to load in the isFullAppPurchased value on initial render.
The setAndStoreFullAppPurchase function will be used to set isFullAppPurchased to true and store it in the user’s phone when the user successfully purchases the app.
const useInAppPurchase = () => { const [isFullAppPurchased, setIsFullAppPurchased] = useState(false) const [connectionErrorMsg, setConnectionErrorMsg] = useState("") // Get data after initial render useEffect(() => { getBooleanData(IS_FULL_APP_PURCHASED).then(data => { setIsFullAppPurchased(data) }) }, []) const setAndStoreFullAppPurchase = boolean => { setIsFullAppPurchased(boolean) storeBooleanData(IS_FULL_APP_PURCHASED, boolean) } return { isFullAppPurchased, connectionErrorMsg, }}2. Implementing the useIAP hook in our custom useInAppPurchase hook
This is where the logic gets a little harder to get your head around. I suggest typing out the code added below rather than copying/pasting. I’ve commented all parts that require explanation and believe it should all make sense if you go through it carefully!
Validating receipts would require a backend which would be time consuming and a considerable amount more effort. In this app, I am awarding the user full app access if:
- The purchase is immediately accepted by Google
- If the purchase pends and is accepted sometime later by Google
- If the purchase pends and then doesn’t go through (I believe this requires a backend and I have never experienced this as a problem with my apps on the store – so I’ll take the hit if it happens and award the user the product without their purchase going through)
Full app access is not awarded if:
- User has no internet connection when presses purchase button
- Purchase is declined immediately by Google (e.g. if user enters wrong Google account username/password)
const useInAppPurchase = () => { const [isFullAppPurchased, setIsFullAppPurchased] = useState(false) const [connectionErrorMsg, setConnectionErrorMsg] = useState("") const { connected, products, getProducts, finishTransaction, currentPurchase, currentPurchaseError, } = useIAP() // Get data after initial render useEffect(() => { getBooleanData(IS_FULL_APP_PURCHASED).then(data => { console.log("isFullAppPurchased: ", data) setIsFullAppPurchased(data) }) }, []) // Get products from play store. useEffect(() => { if (connected) { getProducts(itemSKUs) console.log("Getting products...") } console.log(products) }, [connected, getProducts]) // currentPurchase will change when the requestPurchase function is called. The purchase then needs to be checked and the purchase acknowledged so Google knows we have awared the user the in-app product. useEffect(() => { const checkCurrentPurchase = async purchase => { if (purchase) { const receipt = purchase.transactionReceipt console.log("RECEIPT: ", receipt) if (receipt) { // Give full app access setAndStoreFullAppPurchase(true) try { const ackResult = await finishTransaction(purchase) console.log("ackResult: ", ackResult) } catch (ackErr) { // We would need a backend to validate receipts for purhcases that pended for a while and were then declined. So I'll assume most purchase attempts go through successfully (OK ackResult) & take the hit for the ones that don't (user will still have full app access). console.log("ackError: ", ackErr) } } } } checkCurrentPurchase(currentPurchase) }, [currentPurchase, finishTransaction]) // If user reinstalls app, then they can press purchase btn (SettingsScreen) to get full app without paying again. useEffect(() => { if (currentPurchaseError) { if ( currentPurchaseError.code === "E_ALREADY_OWNED" && !isFullAppPurchased ) { setAndStoreFullAppPurchase(true) } } }, [currentPurchaseError]) const purchaseFullApp = async () => { // Reset error msg if (connectionErrorMsg !== "") setConnectionErrorMsg("") if (!connected) { setConnectionErrorMsg("Please check your internet connection") } // If we are connected & have products, purchase the item. Google will handle if user has no internet here. else if (products?.length > 0) { requestPurchase(itemSKUs[1]) console.log("Purchasing products...") } // If we are connected but have no products returned, try to get products and purchase. else { console.log("No products. Now trying to get some...") try { await getProducts(itemSKUs) requestPurchase(itemSKUs[1]) console.log("Got products, now purchasing...") } catch (error) { setConnectionErrorMsg("Please check your internet connection") console.log("Everything failed. Error: ", error) } } } const setAndStoreFullAppPurchase = boolean => { setIsFullAppPurchased(boolean) storeBooleanData(IS_FULL_APP_PURCHASED, boolean) console.log(`Set and stored full app purchase: `, boolean) } return { isFullAppPurchased, connectionErrorMsg, purchaseFullApp, }}3. Bring useInAppPurchase into HomeScreen
The purchaseFullApp function will be called when user presses purchase. If the purchase is successful, the “full app access available” text will render.
If the user opened the app and pressed the button with no internet connection, we’ll get the red connection error message.
import React from "react"import { View, StyleSheet, Text } from "react-native"import Button from "../../lib/components/Button"import useInAppPurchase from "../../lib/custom_hooks/useInAppPurchase"const HomeScreen = () => { const { isFullAppPurchased, connectionErrorMsg, purchaseFullApp, } = useInAppPurchase() return ( <View style={styles.container}> {isFullAppPurchased ? ( <Text style={{ ...styles.msg, color: "green" }}> Full app access available!!! </Text> ) : null} <Button title="Purchase" handlePress={purchaseFullApp} /> {connectionErrorMsg ? ( <Text style={{ ...styles.msg, color: "red" }}> {connectionErrorMsg} </Text> ) : null} </View> )}And that is everything! We have created a simple one screen app with a Google play store in-app purchase for Android with the React Native IAP package.
This tutorial was a lot of work, so if it was helpful, you can say thanks by subscribing to my YouTube channel where I post coding tutorials. It would be much appreciated!
And if you’re feeling stressed lately, check out my Atomic Meditation app which I built using the custom hook code above. It’s a great app for developing a daily meditation habit and keeping your mind quiet and calm – useful for coders!
Have a great day :)


